Peptide Degradation Signs: 7 Critical Warnings Researchers Should Never Ignore

Every year, research laboratories lose thousands of dollars’ worth of peptides—not because the peptides were synthesized incorrectly, but because subtle degradation went unnoticed until experiments failed.
A peptide can appear crystal clear, dissolve perfectly, and even meet visual expectations while already having lost much of its biological activity. Unfortunately, many researchers discover this only after inconsistent assay results, poor reproducibility, or unexpected experimental failures.
At PeptideAmino Nation, we’ve spent years helping researchers troubleshoot peptide-related challenges. One recurring pattern stands out: most peptide degradation isn’t caused by manufacturing defects—it happens after the peptide reaches the laboratory.
Improper storage, repeated freeze-thaw cycles, moisture exposure, oxidation, unsuitable buffers, and shipping delays are responsible for many degradation issues that researchers mistakenly attribute to peptide quality.
Understanding peptide degradation signs is therefore essential for protecting both your research budget and your experimental integrity.
In this comprehensive guide, you’ll learn:
• The earliest warning signs of peptide degradation
• Why do some degraded peptides still look perfectly normal
• Common laboratory mistakes that accelerate degradation
• How chromatography and mass spectrometry reveal hidden damage
• Real-world case studies from peptide handling
• Practical strategies to maximize peptide stability
Whether you’re working with GLP-1 peptides, growth hormone peptides, healing peptides, cosmetic peptides, or custom research sequences, recognizing degradation early can save weeks—or even months—of research.
Why Peptide Stability Matters More Than Most Researchers Realize
https://pubmed.ncbi.nlm.nih.gov/
Peptides are sophisticated biological molecules.
Unlike many conventional laboratory chemicals, peptides are built from amino acids connected by peptide bonds that can be remarkably sensitive to environmental conditions.
Factors including:
• Temperature
• Moisture
• Oxygen
• Light
• Mechanical agitation
• pH
• Buffer composition
• Freeze-thaw cycles
Can gradually alter their chemical structure.
These structural changes don’t simply reduce purity—they often eliminate the peptide’s ability to interact correctly with receptors, enzymes, antibodies, or biological targets.
This means that researchers may unknowingly continue using degraded peptides while assuming the experimental model is at fault.
The result?
• Failed receptor-binding studies
Inconsistent cell culture results
• Poor reproducibility
• Wasted reagents
• Lost research time
• Higher experimental costs
For this reason, experienced peptide laboratories monitor peptide stability just as carefully as peptide purity.
Understanding Peptide Degradation
Peptide degradation refers to any physical or chemical process that changes the original molecular structure of a peptide.
Once structural integrity is lost, biological performance often declines—even if the peptide still appears visually unchanged.
The most common degradation pathways include:
Oxidation
Sensitive amino acids such as Methionine, Cysteine, and Tryptophan readily react with oxygen.
Oxidation changes the molecular weight of the peptide and frequently reduces receptor-binding capability.
Common causes include:
• Air exposure
• Light exposure
• Elevated temperatures
• Trace metal contamination
Deamidation
Peptides containing Asparagine (Asn) or Glutamine (Gln) are particularly vulnerable to deamidation.
This reaction changes the peptide’s electrical charge while subtly altering its three-dimensional structure.
Even though the peptide remains dissolved and visually identical, biological activity may decline dramatically.
Backbone Hydrolysis
Water can slowly cleave peptide bonds.
This process fragments the peptide into smaller inactive pieces.
Hydrolysis accelerates when peptides remain in solution for extended periods, particularly under unsuitable pH conditions or elevated temperatures.
Hydrophobic Aggregation
Some peptides naturally expose hydrophobic amino acids during storage.
Instead of remaining dissolved, they begin sticking together.
Researchers often notice:
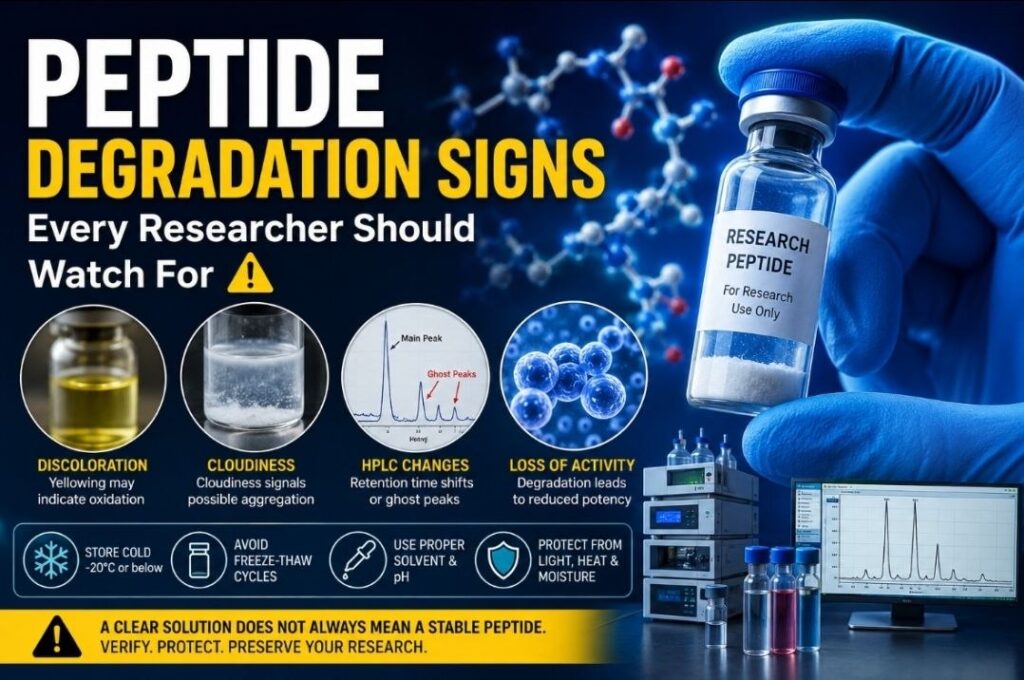
• Cloudiness
• Floating particles
• Visible precipitates
Aggregation reduces the concentration of active peptide remaining in solution.
The Three Most Common Peptide Degradation Signs Researchers Encounter
After assisting thousands of researchers with peptide handling questions, one observation becomes clear:
Most degradation problems reveal themselves through three categories of warning signs:
1. Physical changes
2. Analytical changes
3. Functional changes
Understanding all three provides a far more reliable assessment than relying on appearance alone.
Sign #1 — Visual Discoloration, Cloudiness, or Aggregation
Visual inspection is usually the first step researchers perform after reconstituting a peptide.
While appearance alone can not confirm peptide integrity, obvious physical changes often indicate advanced degradation.
Common warning signs include:
• Yellow discoloration
• Cloudiness
• Floating particles
• Visible precipitate
• Gel-like consistency
• Loss of clarity
Why Does This Happen?
Most visible degradation originates from either:
• Oxidation
• Hydrophobic aggregation
Oxidation frequently affects peptides containing Methionine, Cysteine, or Tryptophan.
As oxidation progresses, solutions may gradually develop a pale yellow or amber tint.
Aggregation occurs when peptide molecules lose their native structure and expose hydrophobic regions.
Rather than remaining evenly dispersed, these molecules attract one another and form insoluble clusters that appear as turbidity or precipitates.
Expert Insight from PeptideAmino Nation
One misconception we regularly encounter is that cloudy peptides simply need more mixing.
Unfortunately, vigorous vortexing or shaking rarely solves the problem.
Instead, excessive mechanical agitation often accelerates aggregation by forcing hydrophobic regions into closer contact.
Gentle swirling is generally a much safer approach when reconstituting sensitive peptides.
What Researchers Should Do
If a previously clear peptide develops:
• Cloudiness,
• Visible particles,
• Precipitation,
• Or significant discoloration,
Treat it as a serious warning sign rather than attempting to “fix” it through aggressive mixing.
Whenever possible, confirm integrity using RP-HPLC or LC-MS before proceeding with valuable experiments.
Key Takeaway
Visual changes are among the easiest peptide degradation signs to recognize—but they represent only part of the story.
Many chemically degraded peptides remain perfectly clear while already losing biological activity.
Sign #2 — HPLC Retention Time Shifts and “Ghost” Peaks
Visual inspection can alert researchers to obvious problems, but the most reliable way to detect peptide degradation is through analytical testing. Among the available techniques, Reverse-Phase High-Performance Liquid Chromatography (RP-HPLC) remains one of the most valuable tools for evaluating peptide integrity.
Even slight chemical modifications can change how a peptide interacts with the HPLC column, making chromatographic analysis an early warning system for degradation.
What Researchers May Observe
When comparing a fresh peptide with an aged or improperly stored sample, researchers may notice:
• A shift in the main retention time
• A decrease in the area of the primary peak
• Peak broadening
• Peak splitting
• Additional small peaks (“ghost peaks”) appearing before or after the main peak
These changes indicate that the original peptide population is no longer uniform.
Why Do Retention Times Change?
Every peptide has a unique balance of hydrophobic and hydrophilic amino acids.
Chemical degradation alters this balance.
For example:
• Deamidation introduces additional negative charge.
• Oxidation changes the chemical properties of Methionine or Tryptophan residues.
• Fragmentation produces smaller peptide pieces with different chromatographic behavior.
As a result, degraded molecules no longer elute from the HPLC column at the same time as the intact peptide.
Even small molecular changes can produce noticeable chromatographic differences.
Understanding “Ghost Peaks”
One of the earliest laboratory signs of degradation is the appearance of small secondary peaks surrounding the main peptide peak.
These are commonly referred to as ghost peaks.
Ghost peaks often represent:
• Oxidized peptide variants
• Deamidated species
• Hydrolysis fragments
Minor synthesis-related impurities that become more apparent as the parent peptide degrades
Although these peaks may represent only a small percentage of the total sample, they frequently signal that degradation has already begun.
Why RP-HPLC Is So Valuable
Unlike visual inspection, RP-HPLC can detect degradation before researchers observe any physical changes.
A peptide solution may remain:
• Crystal clear
• Colorless
• Fully dissolved
Yet chromatography may already show a measurable decline in purity.
For this reason, experienced laboratories routinely compare newly analyzed chromatograms with the original Certificate of Analysis (COA).
If significant deviations appear, further investigation is recommended before continuing expensive experiments.
Expert Insight from PeptideAmino Nation
One of the biggest mistakes researchers make is assuming a peptide is still suitable because it “looks fine.”
In reality, we’ve seen numerous cases where visually perfect peptide solutions produced inconsistent experimental results because chromatography revealed significant chemical degradation.
When experimental outcomes suddenly become inconsistent, analytical testing should always take priority over visual inspection.
Sign #3 — Sudden Loss of Biological Activity
Sometimes the most dangerous form of peptide degradation leaves no visible evidence whatsoever.
The solution looks perfect.
The peptide dissolves normally.
No precipitation appears.
Yet biological performance drops dramatically.
This type of degradation is often the most expensive because researchers may spend weeks troubleshooting cell cultures, assay conditions, or instrumentation before realizing the peptide itself has changed.
Common Functional Warning Signs
Researchers frequently report:
• Reduced receptor binding
• Poor cell signaling responses
• Lower assay sensitivity
• Loss of expected biological activity
• Increased experimental variability
• The need for progressively higher peptide concentrations
If these changes occur unexpectedly, peptide degradation should be considered as one possible explanation.
What Causes Functional Failure?
Several molecular processes can eliminate peptide activity without affecting appearance.
Backbone Hydrolysis
Water slowly breaks peptide bonds, producing smaller inactive fragments.
Although these fragments remain dissolved, they often cannot bind their intended biological targets.
Structural Denaturation
Some peptides depend on maintaining a very specific three-dimensional structure.
Heat, oxidation, unsuitable pH, or repeated freeze-thaw cycles can subtly alter that structure.
Even though the molecule remains intact enough to stay dissolved, receptor recognition may be lost.
Silent Chemical Modifications
Minor chemical reactions such as oxidation or deamidation may leave the peptide visually unchanged while significantly reducing biological potency.
These molecular changes frequently explain why researchers obtain inconsistent assay results despite using apparently identical protocols.
Why Increasing Concentration Is Not the Solution
A common troubleshooting approach is simply increasing peptide concentration after biological responses begin declining.
Unfortunately, this rarely solves the underlying problem.
If the peptide has degraded, adding more degraded peptide does not restore activity.
Instead, higher concentrations may:
• Increase aggregation
• Promote receptor desensitization
• Introduce unwanted degradation products into sensitive experiments
• Produce misleading research data
Whenever biological activity unexpectedly declines, confirming peptide integrity is usually a better strategy than increasing concentration.
Summary Checklist: The Three Major Peptide Degradation Signs
| Sign Type | What Researchers Observe | Most Lightly Cause |
| Visual | Yellowing, cloudiness, floating particles, precipitate | Oxidation or hydrophobic aggregation |
| Analytical | HPLC retention shift, ghost peaks, altered mass spectra | Deamidation, oxidation, fragmentation |
| Functional | Loss of biological activity, weaker receptor binding, inconsistence assay performance | Backbone hydrolysis, structural denaturation, silent chemical degradation |
No single warning sign should be interpreted in isolation.
Experienced researchers evaluate visual appearance, analytical data, and functional performance together before determining whether a peptide remains suitable for research.
Real-World Case Studies: When Small Mistakes Lead to Major Peptide Degradation
Understanding the science is important, but real laboratory experiences often provide the most valuable lessons.
Over the years, researchers have repeatedly encountered peptide failures caused not by poor synthesis, but by seemingly minor handling mistakes during storage, reconstitution, and shipping.
The following case studies illustrate how everyday laboratory practices can silently compromise peptide integrity—and how these costly mistakes can be avoided.
Real-World Case Studies: How Everyday Handling Errors Destroy Peptide Integrity
Laboratory experience consistently shows that most peptide degradation begins after the product arrives—not during synthesis. Even peptides manufactured to exceptionally high purity can lose stability if handled incorrectly during storage, reconstitution, or shipping.
The following real-world scenarios highlight how seemingly small mistakes can have major consequences for peptide integrity and experimental success.
Case Study 1: The “Warm Condensation” Blunder
The Scenario
A research laboratory purchased a custom 24-amino acid peptide containing multiple Asparagine (Asn) and Glutamine (Gln) residues. The peptide arrived as a lyophilized powder and was stored correctly at −20°C.
Whenever the peptide was needed, a junior researcher removed the vial directly from the freezer, immediately opened it on the laboratory bench, weighed the required amount, sealed it, and returned it to storage
Initially, nothing appeared unusual.
The powder looked normal.
No discoloration was visible.
However, after several months, the remaining peptide began forming small clumps, and cell-signaling experiments that had previously produced consistent results suddenly failed.
What Actually Happened?
Lyophilized peptides are highly hygroscopic, meaning they readily absorb moisture from the surrounding air.
Opening a freezing-cold vial in a warm laboratory causes water vapor to condense almost instantly onto the peptide powder.
Although this moisture is often invisible, it creates ideal conditions for slow chemical degradation while the vial is returned to freezer storage.
Subsequent analytical testing revealed extensive deamidation of the peptide’s Asparagine residues, altering the molecule’s charge and reducing receptor-binding activity.
The peptide remained mostly intact visually, but its biological performance had been severely compromised.
Lesson Learned
Never open a frozen peptide vial immediately after removing it from storage.
Instead:
• Leave the vial sealed.
• Allow it to reach room temperature for 30–60 minutes.
• Ideally, warm it inside a desiccator to minimize moisture exposure.
• Only then should the vial be opened.
This simple habit dramatically reduces condensation and helps preserve long-term peptide stability.
Case Study 2: The “Multi-Freeze” Cascade
The Scenario
A research team reconstituted an entire 10 mg vial of a valuable disulfide-containing peptide into a single stock solution.
Rather than preparing aliquots, they stored the entire solution in one tube.
Each wee, they thawed the same vial, removed the required volume for experiments, and returned the remainder to the freezer.
After approximately four weeks, biological responses declined sharply.
Eventually, the solution developed slight cloudiness.
Animal studies that had previously produced reliable results became inconsistent.
What Actually Happened?
Every freeze-thaw cycle exposes dissolved peptides to intense physical stress.
As ice crystals form, peptide molecules become concentrated into microscopic pockets of unfrozen liquid.
Within these highly concentrated regions, peptides are subjected to:
• Mechanical shear
• Structural unfolding
Increased molecular collisions
• Protein and peptide aggregation
For peptides stabilized by delicate disulfide bonds, repeated freeze-thaw cycles can also promote bond scrambling and irreversible misfolding.
Over time, active peptide molecules become trapped inside insoluble aggregates, leaving progressively less functional peptide available for research.
Lesson Learned
Aliquot immediately after reconstitution.
Instead of storing one large stock solution:
• Prepare single-use aliquots.
• Freeze each aliquot immediately.
• Thaw each aliquot only once.
• Discard any unused remainder.
Many experienced peptide laboratories follow one simple rule:
One Freeze. One Thaw. One Experiment.
This approach greatly extends peptide stability while improving experimental reproducibility.
Case Study 3: The Friday Dry Ice Depletion
The Scenario
A biotechnology laboratory ordered a temperature-sensitive peptide rich in Methionine residues.
The shipment was packed on Thursday using dry ice and scheduled for overnight delivery.
Unexpected shipping delays caused the package to remain in transit throughout the weekend.
By Monday morning:
- All dry ice had completely evaporated.
- Internal package temperatures had risen significantly.
- The shipment experienced prolonged exposure to warm, humid conditions.
Although the peptide still appeared usable, laboratory analysis told a different story.
What Actually Happened?
Heat alone can accelerate peptide degradation.
Combined with oxygen and moisture, the effects become even more severe.
Analytical testing revealed:
• New ghost peaks on RP-HPLC
• Significant oxidation products
• Mass shifts consistent with +16 Da and +32 Da oxidation events
The affected Methionine residues had undergone extensive oxidation, substantially reducing peptide quality.
Because the peptide no longer met the laboratory’s purity requirements, the entire batch had to be discarded.
The result was weeks of experimental delays and the loss of valuable research materials.
Lesson Learned
Temperature-sensitive peptides should never rely on optimistic shipping schedules.
Whenever possible:
• Ship early in the week (Monday or Tuesday).
• Allow extra cooling capacity for unexpected delays.
• Use appropriately insulated shipping containers.
• Protect peptides from oxygen and moisture during transit whenever practical.
Planning for the worst-case shipping scenario, rather than the ideal one, significantly reduces the risk of degradation.
Common Misconceptions About Peptide Degradation
One surprising observation from years of supporting peptide researchers is that many degradation problems begin with incorrect assumptions rather than incorrect laboratory technique.
In fact, approximately 20–35% of technical support inquiries involve suspected peptide degradation, unexpected loss of activity, or poor solubility.
Most of these cases can be traced back to a handful of persistent misconceptions that continue to circulate throughout the research community.
Understanding these misconceptions can help researchers recognize peptide degradation earlier, avoid unnecessary troubleshooting, and make better decisions about peptide storage and handling.
Common Misconceptions About Peptide Degradation
Over the years, one trend has become increasingly clear at PeptideAmino Nation: researchers often don’t lose experiments because they lack technical skills—they lose them because they trust common myths about peptide stability.
Based on years of customer support experience, approximately 20–35% of technical inquiries are directly or indirectly related to suspected peptide degradation, unexpected loss of activity, or poor solubility.
Fortunately, many of these issues can be prevented by understanding a few fundamental principles.
Let’s examine the misconceptions that continue to mislead even experienced researchers.
Misconception #1: “If the Solution Is Clear, the Peptide Must Be Fine.”
This is by far the most dangerous misconception in peptide research.
Researchers frequently assume that because a peptide solution is:
• Crystal clear
• Completely colorless
• Free from visible particles
The peptide must still be fully active.
Unfortunately, this assumption is often incorrect.
The Reality
Many forms of chemical degradation occur entirely at the molecular level.
Processes such as:
• Deamidation
• Oxidation
• Backbone hydrolysis
• N-terminal cyclization
may leave the solution looking completely normal.
The peptide can remain fully dissolved while already losing significant biological activity.
In other words:
A clear solution does not prove a stable peptide.
This is why experienced laboratories rely on analytical testing—not visual appearance—to confirm peptide integrity.
Misconception #2: “Refrigerated Peptides Stay Stable for Months.”
Another common belief is that once a peptide has been reconstituted, storing it at 4°C automatically preserves stability.
The Reality
Liquid state is where peptide degradation accelerates most rapidly.
Once dissolved, peptides become increasingly susceptible to:
• Hydrolysis
• Oxidation
• Deamidation
• Aggregation
For many research peptides, measurable degradation may begin within 2–4 weeks, even under refrigeration.
While storage recommendations vary depending on the peptide sequence and formulation, long-term preservation is generally best achieved by storing peptides as lyophilized powder at −20°C or −80°C whenever appropriate.
Misconception #3: “I’ll Just Increase the Concentration.”
When experiments stop producing expected results, researchers sometimes respond by increasing peptide concentration.
Although this seems logical, it often creates additional problems.
The Reality
If degradation has already occurred, increasing concentration does not restore molecular integrity.
Instead, researchers may unintentionally:
• Increase degraded peptide fragments
• Promote additional aggregation
Introduce greater experimental variability
• Misinterpret biological responses
Rather than increasing concentration, it is usually more valuable to investigate storage conditions, handling history, and peptide integrity.
Misconception #4: “One Reconstitution Buffer Works for Every Peptide.”
Many laboratories routinely use sterile water or PBS for every peptide.
While convenient, this approach overlooks one important fact:
Every peptide behaves differently.
The Reality
Peptide solubility and stability depend heavily on:
• Amino acid composition
• Net charge
• Hydrophobicity
• Sequence length
• Structural modifications
Highly hydrophobic peptides may initially require small amounts of organic solvents before dilution into aqueous buffers.
Conversely, certain sequences containing Asparagine or Glutamine may degrade more rapidly under unsuitable pH conditions.
Selecting an appropriate solvent should always be based on the peptide’s specific characteristics rather than a universal protocol.
Expert Troubleshooting Checklist
When researchers contact our support team about suspected peptide degradation, the first questions are rarely about how the solution looks.
Instead, experienced troubleshooting begins with the peptide’s handling history.
Typical questions include:
✓ What is the peptide sequence?
✓ When was the peptide reconstituted?
✓ Which solvent or buffer was used?
✓ How has it been stored?
✓ How many freeze-thaw cycles has it experienced?
✓ Has it been exposed to elevated temperatures during shipping or storage?
In many cases, the answers reveal the source of the problem long before laboratory analysis is required.
Which Peptide Families Are Most Sensitive to Degradation?
Although every peptide can degrade under unfavorable conditions, some families are naturally more sensitive because of their amino acid composition, structural complexity, and physicochemical properties.
Understanding these differences allows researchers to adopt storage strategies that match the specific vulnerabilities of each peptide.
1. GLP-1 Peptides and Incretin Mimetics
Examples include:
• Semaglutide
• Tirzepatide
• Exenatide
These peptides have become some of the most widely researched metabolic peptides in modern laboratories.
However, they also demand careful handling.
Why They’re Vulnerable
Many GLP-1 analogs contain engineered fatty acid chains that extend biological half-life.
While these lipid modifications improve pharmacological performance, they also increase the tendency for peptide molecules to associate with one another.
Improper handling may encourage:
• Hydrophobic aggregation
• Self-association
• Fibril formation
Additionally, sequences containing Methionine and Tryptophan remain susceptible to oxidation from oxygen, heat, and light.
Best Practices
Researchers can improve stability by:
• Avoid vigorous shaking
• Minimizing freeze-thaw cycles
• Protecting samples from excessive heat and light
• Using recommended storage conditions
2. Growth Hormone-Releasing Peptides
Examples include:
• GHRP-2
• GHRP-6
• Ipamorelin
• CJC-1295
Although generally shorter than GLP-1 peptides, these sequences possess their own stability challenges.
Why They’re Vulnerable
Many growth hormone secretagogues rely on precise terminal structures for biological activity.
Exposure to unsuitable moisture levels, temperature fluctuations, or improper pH conditions may promote:
• Backbone hydrolysis
• Terminal modifications
• Structural instability
Because many of these peptides remain visually clear after degradation, analytical verification becomes especially valuable.
3. Healing and Tissue Repair Peptides
Examples include:
• BPC-157
• TB-500 (Thymosin Beta-4 fragment)
These peptides are frequently investigated in regenerative research.
Despite their popularity, they are not immune to degradation.
Why They’re Vulnerable
TB-500 contains amino acids that readily undergo oxidation.
Meanwhile, inappropriate pH conditions can accelerate chemical reactions affecting peptide stability.
Researchers should, therefore, pay particular attention to:
Storage temperature
Oxygen exposure
Light protection
Buffer selection
Freeze-thaw management
Sensitivity Summery
| Peptide Family | Primary Risk | Best Prevention Strategy |
| GLP-1 peptides | Aggregation, oxidation | Avoid shaking, minimize free-thaw cycles, protect from heat |
| Growth Hormone Peptides | Backbone instability, hydrolysis | Proper reconstitution and cold storage |
| Healing Peptides | Oxidation, pH sensitivity | Protect from oxygen, light, and unsuitable pH |
Understanding which peptide families are naturally more fragile helps researchers build storage protocols that reduce degradation before it affects experimental outcomes.
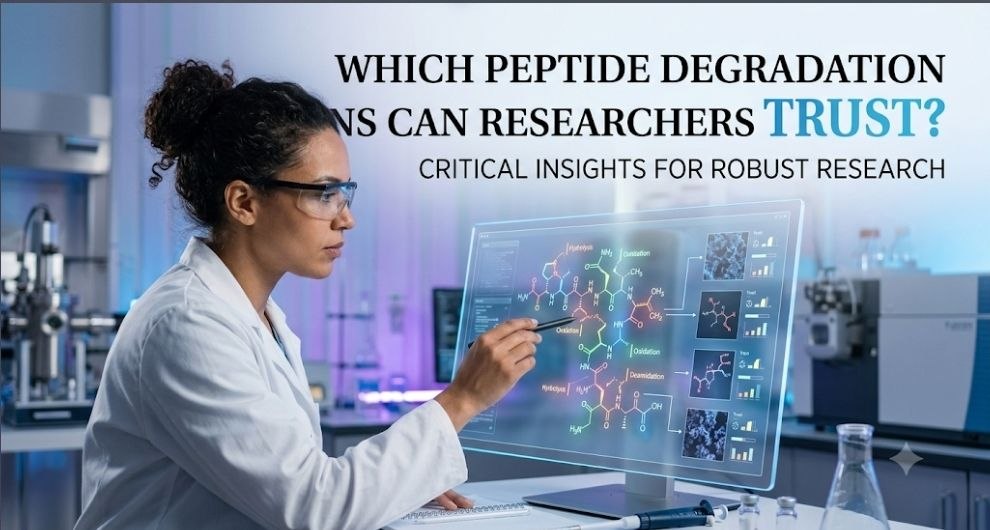
Which Peptide Degradation Signs Can Researchers Trust?
Recognizing peptide degradation requires more than simply looking at the vial.
Some indicators provide strong evidence that a peptide has degraded, while others can be surprisingly misleading.
Experienced researchers combine visual observations, analytical testing, and functional performance before deciding whether a peptide remains suitable for research.
Let’s examine which warning signs deserve the most attention.
1. Cloudiness, Turbidity, or Precipitation
One of the easiest degradation signs to recognize is the appearance of a cloudy solution or visible particles after reconstitution.
What It Usually Means
Cloudiness often indicates hydrophobic aggregation.
Instead of remaining evenly dissolved, peptide molecules begin sticking together after unfolding or experiencing environmental stress.
Researchers may notice:
• White haze
• Floating particles
• Fine sediment
• Visible precipitates
These aggregates reduce the amount of active peptide available in the solution and can significantly affect experimental reproducibility.
Can It Be Trusted?
Yes.
If a peptide that was previously clear becomes cloudy or develops visible particles without another obvious explanation, researchers should consider this a strong indication of physical instability.
Simply shaking or vortexing the solution rarely restores the peptide to its original condition.
2. Yellow or Amber Discoloration
Another visible warning sign is gradual yellowing of a peptide solution.
Although not every oxidized peptide changes color, discoloration often signals advanced chemical degradation.
What Causes It?
Oxidation frequently affects amino acids such as:
• Methionine
• Cysteine
• Tryptophan
Exposure to oxygen, heat, light, or trace metal contamination can accelerate these reactions.
As oxidation progresses, the solution may slowly develop a yellow or amber appearance.
Can It Be Trusted?
Moderately.
Yellowing is an important warning sign.
However, many oxidized peptides never become visibly discolored.
The absence of color change should never be interpreted as proof that oxidation has not occurred.
3. RP-HPLC Retention Time Changes
Among routine laboratory techniques, RP-HPLC remains one of the most valuable methods for evaluating peptide integrity.
Unlike visual inspection, chromatography detects subtle molecular changes before they become obvious to the eye.
Researchers should compare current chromatograms with the original Certificate of Analysis whenever possible.
Warning Signs Include:
• Retention time shifts
• Peak broadening
• Reduced main peak area
• Peak splitting
• Appearance of ghost peaks
These changes often indicate oxidation, deamidation, fragmentation, or other chemical modifications.
Can It Be Trusted?
Absolutely.
RP-HPLC is widely considered one of the gold standards for monitoring peptide purity and stability.
4. LC-MS Mass Shifts
When researchers need definitive molecular confirmation, Liquid Chromatography–Mass Spectrometry (LC-MS) provides exceptional analytical precision.
Instead of simply showing that degradation has occurred, LC-MS can often identify the exact chemical modification.
Common findings include:
• +16 Da — Single oxidation
• +32 Da — Double oxidation
• +1 Da — Deamidation
- Smaller molecular fragments — Backbone hydrolysis
These characteristic mass changes help researchers distinguish between different degradation pathways.
Can It Be Trusted?
Yes.
LC-MS remains one of the most reliable analytical tools available for peptide characterization.
The Most Misleading Indicator of All: Solution Clarity
Perhaps the most important lesson every peptide researcher should remember is this:
A Clear Solution Is Not Evidence of a Stable Peptide
Many competing articles unintentionally encourage researchers to rely on appearance.
If the solution is clear…
If there are no particles…
If the peptide dissolved easily…
Everything must be fine.
Unfortunately, peptide chemistry doesn’t work that way.
The “Clear Solution” Trap
A peptide can remain:
• Completely colorless
• Perfectly transparent
• Fully dissolved
While already experiencing:
• Deamidation
• Backbone hydrolysis
• Oxidation
• Structural rearrangement
These reactions occur at the molecular level.
They do not necessarily change the way light passes through the solution.
As a result, researchers may unknowingly continue using peptides whose biological activity has already declined significantly.
What Researchers Should Trust
Instead of relying on one observation, combine multiple sources of evidence.
| Indicator | Reliability | Recommended Action |
| LC-MS Analysis | 5 Stars Definitive | Confirm molecular integrity whenever possible |
| RP-PHLC Analysis | 5 Stars Cold Standard | Compare chromatograms with the original COA. |
| Cloudiness or Precipitation | 4 Stars Highly Reliable | Treat as evidence of aggregation |
| Yellowing | 3 Stars Moderate Reliable | Suspect oxidation and verify analytically |
| Clear Solution | 1 Star Unreliable | Never assume stability based on appearance alone |
Expert Insight: The Ghost in the Clear Vial
After years of supporting peptide researchers, one observation stands above all others:
The most expensive peptide degradation is usually the one researchers never see.
Many laboratories spend days troubleshooting:
• Cell culture conditions
• Assay protocols
• Instrument calibration
• Buffer preparation
Only to discover that the peptide had silently degraded weeks earlier.
The solution looked perfect.
The peptide dissolved normally.
Yet subtle chemical changes had already destroyed its biological activity.
At PeptideAmino Nation, we encourage researchers to view peptide quality through analytical evidence, not visual appearance alone.
When unexpected experimental failures occur, peptide integrity should always be part of the troubleshooting process.
Common Storage Mistakes That Quietly Destroy Peptide Stability
Most degraded peptides leave the manufacturing facility in excellent condition.
The real problems usually begin after the shipment arrives.
Simple handling habits—opening a cold vial too quickly, repeatedly freezing and thawing the same solution, using unsuitable storage equipment, or selecting the wrong buffer—can quietly shorten peptide shelf life without any obvious warning.
Common Storage Mistakes That Quietly Destroy Peptide Stability
One of the biggest misconceptions in peptide research is that degradation begins during manufacturing.
In reality, most high-quality research peptides leave the manufacturer in excellent condition. The majority of stability issues develop later because of improper storage, repeated handling, or poor laboratory practices.
After years of assisting researchers with peptide handling questions, we’ve found that a handful of avoidable mistakes account for most degradation-related problems.
Fortunately, these mistakes are easy to prevent once you understand the science behind them.
Mistake #1: Opening a Frozen Vial Too Soon
This is one of the most common—and most overlooked—causes of peptide degradation.
What Happens?
A researcher removes a lyophilized peptide from a −20°C or −80°C freezer and immediately opens the vial.
Although this seems harmless, the cold surface of the vial instantly attracts moisture from the surrounding air.
Because lyophilized peptides are highly hygroscopic, they rapidly absorb this condensed moisture.
Once the vial is returned to freezer storage, that trapped water begins promoting slow chemical degradation.
Potential consequences include:
•Deamidation
•Hydrolysis
•Reduced long-term stability
• Lower biological activity
Best Practice
Always allow frozen peptide vials to remain sealed while they warm to room temperature.
For maximum protection:
• Allow 30–60 minutes before opening.
• If available, warm the sealed vial inside a desiccator.
• Open only after the vial has completely equilibrated.
This simple step can significantly reduce moisture-related degradation.
Mistake #2: Repeated Freeze-Thaw Cycles
Many laboratories prepare one large stock solution and repeatedly thaw the same vial whenever peptide is needed.
Although convenient, this practice is one of the fastest ways to damage sensitive peptides.
Why Freeze-Thaw Cycles Matter
Each freeze-thaw cycle exposes peptides to:
• Mechanical stress
• Ice crystal formation
• High local peptide concentrations
• Structural unfolding
• Increased aggregation
Over time, these stresses can permanently alter peptide structure.
Even if the solution still appears clear, biological activity may gradually decline.
Best Practice
Immediately after reconstitution:
• Divide the solution into single-use aliquots.
• Freeze each aliquot separately.
• Thaw each aliquot only once.
• Discard any unused remainder.
Many experienced peptide laboratories follow one simple principle:
One Freeze → One Thaw → One Experiment
This approach greatly improves long-term stability and experimental consistency.
Mistake #3: Using Frost-Free Freezers
Many researchers assume that any freezer maintained at −20°C provides suitable peptide storage.
However, frost-free freezers introduce a hidden problem.
Why Frost-Free Freezers Can Be Harmful
Unlike manual-defrost laboratory freezers, frost-free units automatically warm themselves at regular intervals to prevent ice accumulation.
These repeated temperature fluctuations expose stored peptides to continuous thermal cycling.
Although each cycle is relatively small, the cumulative effect over weeks or months may accelerate degradation.
Best Practice
Whenever possible, store valuable peptide stocks in:
• Manual-defrost laboratory freezers
• Dedicated research freezers
• Stable −20°C or −80°C storage environments
Maintaining consistent temperatures is generally more important than preventing frost buildup.
Mistake #4: Choosing the Wrong Reconstitution Solution
Researchers sometimes assume that every peptide should be dissolved using the same solvent.
Unfortunately, peptide chemistry is far more complex.
Why Solvent Selection Matters
Peptide stability depends on several factors, including:
• Amino acid sequence
• Net electrical charge
• Hydrophobicity
• Molecular length
• Structural modifications
Some peptides dissolve readily in aqueous solutions.
Others may initially require a small amount of an appropriate organic solvent before dilution into the final research buffer.
Using an unsuitable solvent or inappropriate pH can accelerate degradation reactions or reduce solubility.
Always review the manufacturer’s recommendations and consider the specific properties of the peptide before selecting a reconstitution solution.
Mistake #5: Vigorous Shaking and Vortex Mixing
When peptides do not dissolve immediately, many researchers instinctively shake or vortex the vial.
Although well-intentioned, this often makes the problem worse.
What Happens?
Excessive agitation introduces:
• Mechanical stress
• Air-liquid interfaces
• Increased molecular collisions
These conditions can encourage hydrophobic regions of peptide molecules to interact, increasing the likelihood of aggregation.
Best Practice
Instead of shaking:
• Gently swirl the vial.
• Slowly invert the tube several times.
• Allow sufficient time for complete dissolution.
Patience is usually more effective than aggressive mixing.
Recommended Best Practices for Maximizing Peptide Stability
Protecting peptide integrity begins with consistent laboratory habits.
Researchers can significantly improve stability by following these practical recommendations:
For Lyophilized Peptides
✔ Store at −20°C or −80°C for long-term preservation.
✔ Keep vials tightly sealed until they reach room temperature.
✔ Minimize exposure to moisture.
✔ Limit unnecessary opening and closing of storage containers.
✔ Protect sensitive peptides from prolonged exposure to light.
For Reconstituted Peptides
✔ Prepare single-use aliquots immediately after reconstitution.
✔ Minimize freeze-thaw cycles.
✔ Store according to the manufacturer’s recommendations.
✔ Label aliquots with the preparation date and storage conditions.
✔ Avoid unnecessary agitation during mixing.
Typical Storage Guidelines
| Peptide Form | Recommended Storage | General Stability |
| Lyophilized Powder | 20°C to −80°C | Long-term storage (often 1–2 years or longer when stored appropriately) |
| Lyophilized Powder | Refrigerated (4°C) | Short-term storage only |
| Reconstitution Aliquots | Frozen (−20°C or below) | Longer stability than refrigerated liquid; varies by peptide and formulation |
| Reconstitution Solution | Refrigerated (4°C) | Best used within the manufacturer’s recommended storage period; stability depends on the peptide and solvent |
Note: Actual shelf life varies depending on the peptide sequence, formulation, solvent, and storage conditions. Always follow the manufacturer’s product-specific guidance.
Key Takeaway
Good peptide stability is rarely the result of a single storage decision.
Instead, it comes from consistently following best practices—from the moment a shipment arrives to the final experimental aliquot.
Small improvements in handling can dramatically reduce degradation risk, improve reproducibility, and help researchers get the most value from every peptide sample.
Evaluating Peptides After Shipping Delays
Shipping delays caused by customs inspections, weather disruptions, or courier issues are an unavoidable reality in global research logistics.
The important question isn’t simply “Was the shipment delayed?”
It’s “Did the delay compromise peptide integrity?”
Evaluating Peptides After Shipping Delays
International shipments don’t always go according to plan.
Customs inspections, weather disruptions, airline delays, and courier bottlenecks can extend transit times by several days. While not every delay damages a peptide, every delayed shipment deserves careful evaluation before it is introduced into a valuable research project.
At PeptideAmino Nation, we encourage researchers to evaluate delayed shipments systematically rather than making assumptions based solely on appearance.
The goal is simple:
Determine whether the peptide remained within acceptable handling conditions before beginning your experiment.
Step 1: Evaluate the Shipment Before Opening the Vials
The first inspection begins with the shipping package—not the peptide itself.
Ask yourself the following questions:
• Was dry ice or the cooling material still present?
• Was the insulated container intact?
• Were the vials securely packaged?
• Is there evidence of moisture inside the shipping box?
• Did the shipment arrive within the expected delivery window?
If your shipment includes a temperature logger or cold-chain indicator, review the recorded data before storing or using the peptides.
This information often provides the earliest indication of whether temperature excursions occurred during transit.
Step 2: Consider the Form of the Peptide
Not all peptides respond equally to shipping delays.
One of the first considerations is whether the peptide arrived as:
• Lyophilized powder
• Reconstituted solution
Lyophilized Peptides
Dry peptides are generally far more stable during temporary temperature fluctuations because water—the primary driver of many degradation reactions—is absent.
Although prolonged heat exposure should still be avoided, lyophilized peptides often tolerate short shipping delays better than liquid formulations.
Reconstituted Peptides
Liquid peptides are significantly more vulnerable.
Extended exposure to elevated temperatures may accelerate:
• Hydrolysis
• Oxidation
• Deamidation
• Aggregation
For this reason, maintaining the cold chain is especially important for reconstituted samples.
Step 3: Perform a Careful Visual Inspection
Before preparing the peptide for research, examine each vial carefully.
For Lyophilized Powder
Look for:
• An intact, dry cake or powder
• Uniform appearance
• Absence of unusual discoloration
• There is no evidence of melting or excessive moisture
If the powder appears sticky, gummy, or collapsed, additional evaluation may be warranted before use.
For Reconstituted Solutions
After gentle mixing, inspect for:
• Cloudiness
• Floating particles
• Precipitation
• Unexpected yellowing
These observations do not confirm every form of degradation, but they can identify obvious physical instability.
Step 4: Verify Solubility
If appropriate for your laboratory protocol, prepare a small test aliquot rather than immediately reconstituting the entire sample.
A peptide that suddenly demonstrates:
• Poor dissolution
• Persistent cloudiness
• Visible aggregation
May have experienced structural changes during transit.
Avoid vigorous vortexing in an attempt to force dissolution.
Instead, allow sufficient time for gentle mixing and compare the peptide’s behavior with previous batches whenever possible.
Step 5: Confirm Using Analytical Methods
When a shipment has experienced significant delays—or when experimental accuracy is especially important—analytical verification provides the greatest confidence.
RP-HPLC
Compare the chromatogram with the original Certificate of Analysis.
Look for:
• Reduced purity
• Retention time shifts
• Peak broadening
• Ghost peaks
LC-MS
Mass spectrometry can identify characteristic degradation products, including:
• Oxidation
• Deamidation
• Fragmentation
These techniques provide objective evidence that can not be obtained through visual inspection alone.
When Should Researchers Reject a Shipment?
Although many delayed shipments remain suitable for research, certain situations deserve extra caution.
Examples include:
• Reconstituted peptides exposed to prolonged elevated temperatures.
• Significant evidence of moisture intrusion into lyophilized products.
• Severe cloudiness or precipitation that was not previously present.
• Analytical testing demonstrates unacceptable purity loss.
• Obvious damage to packaging that may have compromised storage conditions.
Whenever uncertainty exists, documenting the shipment condition and contacting the supplier promptly is often the most appropriate course of action.
Five Expert Tips Every Researcher Should Follow When Peptides Arrive
Protecting peptide integrity begins the moment the shipment reaches your laboratory.
The following best practices can help reduce degradation risk and improve long-term experimental reproducibility.
1. Inspect the Shipment Immediately
Treat every delivery as part of your quality-control process.
Check:
• Shipping condition
• Cooling materials
• Packaging integrity
• Product labeling
Document anything unusual before placing peptides into storage.
2. Allow Frozen Vials to Reach Room Temperature Before Opening
Never remove a frozen vial from the freezer and immediately break the seal.
Instead:
• Keep the vial sealed.
• Allow it to warm naturally for approximately 30–60 minutes.
• Open only after condensation can no longer form.
This simple habit helps protect lyophilized peptides from moisture exposure.
3. Aliquot Immediately After Reconstitution
Preparing multiple small aliquots reduces unnecessary freeze-thaw cycles.
Each aliquot should ideally be used only once.
This approach helps preserve peptide stability while improving consistency between experiments.
4. Store Peptides Under Stable Conditions
Avoid unnecessary temperature fluctuations.
Whenever appropriate:
• Store lyophilized peptides at recommended freezer temperatures.
• Keep storage conditions consistent.
• Minimize repeated handling of stock vials.
Stable storage environments generally improve long-term peptide preservation.
5. Handle Peptides Gently
Peptides should never be treated like ordinary laboratory chemicals.
During reconstitution:
• Swirl gently.
• Avoid excessive shaking.
• Allow time for complete dissolution.
Gentle handling reduces the likelihood of aggregation and unnecessary physical stress.
Expert Insight: The One Lesson Every Researcher Should Remember
Throughout this guide, we’ve discussed oxidation, aggregation, chromatography, freeze-thaw damage, storage, and shipping.
Yet one principle consistently stands above all others.
Never Confuse Solubility With Stability
A peptide can appear:
• Crystal clear
• Perfectly dissolved
• Completely colorless
while already experiencing molecular changes that dramatically reduce biological activity.
The absence of visible warning signs is not evidence that degradation has not occurred.
When experimental performance suddenly changes without explanation, peptide integrity should always be considered as part of the investigation.
Analytical confirmation—particularly RP-HPLC and LC-MS—provides far greater confidence than visual appearance alone.
Conclusion
Peptide degradation is often subtle, progressive, and easy to overlook. While cloudiness, discoloration, and precipitation are valuable warning signs, many of the most damaging chemical changes occur without any visible evidence.
By understanding the causes of degradation, avoiding common handling mistakes, using proper storage techniques, and verifying peptide integrity when needed, researchers can improve reproducibility, protect valuable samples, and generate more reliable experimental data.
At PeptideAmino Nation, we’re committed to supporting the research community with high-quality research peptides, transparent documentation, and educational resources that help researchers make informed decisions throughout every stage of peptide handling.
Whether you’re working with GLP-1 peptides, growth hormone peptides, healing peptides, or custom peptide sequences, adopting proper stability practices today can prevent costly research setbacks tomorrow.
Frequently Asked Questions (FAQs)
1. Can a peptide degrade while remaining completely clear?
Yes. Many forms of chemical degradation, including oxidation, deamidation, and backbone hydrolysis, occur at the molecular level and may not produce visible changes. A clear solution should never be considered proof that a peptide remains fully intact.
2. What causes a peptide solution to turn yellow?
Yellowing is commonly associated with oxidation, particularly in peptides containing Methionine, Cysteine, or Tryptophan. Heat, oxygen, light, and trace metal contaminants can accelerate this process.
3. How can researchers confirm peptide degradation?
Analytical techniques such as RP-HPLC and LC-MS are among the most reliable methods for evaluating peptide integrity. These techniques can detect purity changes, oxidation, deamidation, fragmentation, and other structural modifications that are not visible to the naked eye.
4. Why should freeze-thaw cycles be minimized?
Repeated freezing and thawing can expose peptides to mechanical stress, aggregation, and structural instability. Preparing single-use aliquots immediately after reconstitution helps reduce this risk.
5. What is the biggest mistake researchers make when storing peptides?
One of the most common mistakes is opening frozen lyophilized vials before they have reached room temperature. This allows moisture to condense onto the peptide powder, increasing the risk of long-term degradation. Proper handling from the moment the peptide arrives is essential for maintaining stability.
6. Can peptides degrade without changing color?
Yes. Many forms of peptide degradation—especially deamidation, oxidation, and backbone hydrolysis—occur at the molecular level and may not cause any visible color change. A peptide solution can remain completely clear and colorless while its biological activity has already declined significantly.
7. What are the first signs of peptide degradation?
The earliest signs are often subtle and include HPLC retention time shifts, small ghost peaks on chromatograms, reduced assay potency, or slight yellowing of the solution. Visible cloudiness or precipitation usually appears later and often indicates aggregation.
8. How long do reconstituted peptides last?
Stability depends on the peptide sequence, solvent, and storage conditions. In general, reconstituted peptides stored refrigerated at 4°C are best used within 2–4 weeks, while frozen aliquots stored at −20°C or below may remain stable for several months. Always follow the manufacturer’s peptide-specific guidance.
9. Can freeze-thaw cycles damage peptides?
Yes. Repeated freeze-thaw cycles can cause structural unfolding, aggregation, and loss of biological activity. The best practice is to aliquot peptides immediately after reconstitution and thaw each aliquot only once.
10. How do researchers detect peptide degradation?
Researchers typically use RP-HPLC and LC-MS. RP-HPLC reveals purity changes, retention time shifts, and ghost peaks, while LC-MS confirms molecular modifications such as oxidation, deamidation, or peptide fragmentation.
11. Does oxidation destroy peptide activity?
Oxidation can significantly reduce or eliminate peptide activity, especially in sequences containing Methionine, Cysteine, or Tryptophan. These amino acids are particularly sensitive to oxygen, light, and elevated temperatures.
12. Can HPLC detect peptide degradation?
Aggregation occurs when peptide molecules unfold and expose hydrophobic regions that stick together. Common triggers include repeated freeze-thaw cycles, excessive shaking or vortexing, high peptide concentrations, unsuitable solvents, and temperature stress.
13. How should lyophilized peptides be stored?
Lyophilized peptides should be stored tightly sealed at −20°C or −80°C in a dry environment. Before opening a frozen vial, allow it to reach room temperature while still sealed to prevent moisture condensation.
14. What is the difference between peptide stability and peptide purity?
Purity describes the percentage of the desired peptide present at the time of analysis, while stability describes how well that peptide maintains its original structure and activity during storage and handling. A peptide can be highly pure initially and still lose stability over time if stored improperly.
Continue Exploring Our Peptide Research Guides
How to Calculate Peptide Molarity: 10 Powerful Steps for Accurate Research Success
Why Researchers Use Bacteriostatic Water: 9 Proven Reasons Every Laboratory Should Know
How Peptide Length Influences Stability: 9 Powerful Scientific Insights Every Researcher Should Know
Understanding Peptide Oxidation: 15 Powerful Ways to Prevent Costly Peptide Degradation
Understanding Retention Time in Peptide HPLC
Can Different Peptides Be Reconstituted the Same Way? 9 Powerful Facts Every Researcher Must Know
Light Exposure vs Peptide Stability: 9 Powerful Truths to Prevent Costly Research Failures
